|
|
Post by Pharmer Phil on Mar 19, 2005 10:00:59 GMT -6
A Good Place to Start Is:The Garden Area Now, It doesn't matter if you have an ACRE sized garden, Or a small, Raised bed, the Most Important thing is... The SoilLets Have a loook First at: Raised Beds Simple, easy to care for, These can be Idea for the Busy person who wants a garden, those who haven't much room, and in some cases. Those who have Physical handicaps, in which gardening conventionally, would be impossible. And The Good News IsYou can grow enough vegetables to enjoy all season Long, in as small a space as 64 square feet! Thumb To do this, You will need some wooden Planks, as long as you like, four of them to form a square, actually, you could get fancy and use three to form a tri-angle! None the less, the best boards are 12' in width, and , DO NOT USE TREATED LUMBERI don't care If treated lumber WILL last forever, You... Will Not! and studies have shown that treated lumber, as well as Creosote treated Rail-road ties DO LEACH INTO THE SURROUNDING SOIL. Regular 2x12 Pine will last in your bed for several years, A good choice, if you have the $$$ is cedar or Plastic Board, which several companies are now selling ready-made raised bed kits.I have seen some really attractive frames made from Logs, bales of straw(not recomended because of MICE), so use your creativeness! Mark off the area where your new raised bed will be. Take a flat nosed spade and remove the sod work the soil up to a depth of at least 8 inches, with a shovel, spade, or tiller. Assemble your frame around this area, using either wooden or metal stakes,2 foot long, driven half way into the ground to hold it all together. Add top soil, compost,etc. to bring the LEVEL UP TO ABOUT 6 INCHES ABOVE THE FRAME, SPREAD IT OUT AND WATER WELL. Now, go have a break and sort through your seed.Ya see..while you are sorting your seed, the raised bed is settling and the next day, It will be ready to plant!
|
|
|
|
Post by jeanette on Mar 19, 2005 10:35:04 GMT -6
i'm thinking of putting herbs in a big old tractor tire, been trying to find someone who will fill that big old thing with dirt. Shaking
|
|
|
|
Post by YB on Mar 20, 2005 8:30:39 GMT -6
WHAT'S your address, I will have Doug drive over and fill it for you. ..
Y.W. Doug Thumb
|
|
|
|
Post by theresa on Mar 20, 2005 13:40:27 GMT -6
ROTFLMAO Disturbed Thumb
|
|
|
|
Post by seadog on Mar 20, 2005 15:12:18 GMT -6
I do all of my gardening in beds, but don't do frames around them. They are raised above the paths because of the looseness of the soil and years of compost. I mulch along the sides of the bed and in the paths with spoiled alfalfa hay and leaves and the following spring rake the worm castings from the path onto the bed. The worms in my 50' x 35' space can easily digest a ton of hay a year.
This year I'm going to try not loosening the dirt at all since they seem to lose moisture much quicker when the ground is loose and we have a drought situation.
|
|
|
|
Post by douglas on Mar 20, 2005 19:26:46 GMT -6
Will dis work Jeanette ;D ;D  |
|
|
|
Post by jeanette on Mar 21, 2005 15:40:18 GMT -6
yep!! sure wish i had one.. we do have a tractor and loader but you can't really scoop with it.
|
|
|
|
Post by vassarphan on May 19, 2005 13:36:55 GMT -6
Was excited to see this post Phil.... we just added a deck onto the back side of our house and were wanting to do just a little bit of landscaping between the back door of our garage and the steps to our deck... we have lattice work on the bottom of the deck phor "decor" and to cover the bottom,,, but still wanted to add some phlowers to kind of "spruce" things up a bit... we had JUST talked about "building" a "raised bed" last night, so THANKS phor the inpho!!! We hope to get started on this project by the weekend... We can't build it up too high though, with the lattice,, so do you recommend the pine along the lattice work to help keep the dirt in??? We were going to place some of those cement stones/edging along the phront side.... Is it best to add plastic or a mesh on the bottom bephore adding dirt to this "enclosed area"??
|
|
|
|
Post by Pharmer Phil on May 20, 2005 6:56:01 GMT -6
Well Vassarphan... I do reccomend using the pine as you detail. Your Raised bed, will be a good bed, even if you use a 2x6 dimension. Seeing how a 2x6 is actually 1 1/2 x 5 1/2 (Phreakin' conphusing Huh!)  Just dig down in the exsisting soil bephore you add your soil and other components, about a shovel depth, and with the 2x6 you will gain about a 14 inch depth for your plants to 'root' in! Thumb a note here, a 1x6 can also be used; however, will require more stakes to prevent 'B0wing' from the dirt in the centers |
|
|
|
Post by GrannyG on Sept 20, 2005 21:43:39 GMT -6
I keep my eye open for people throwing away big watering troughs that are all rusted out and discarded. Then I haul them home and drag them out to the garden area. There I start to compost in them , and when the dirt level is right, I plant my veggies in them. I have one I use for tomato plants, another for Zucchini, I have oblong ones in the front of the house and in the fall I sprinkle a handful of lettuce seeds, spinach, and keep them moist. I have glass storm doors over the oblong troughs which I can raise, let open on days it is not freezing, and towards spring, I have great lettuce for us to use, then when it is gone, I plant onions in it. I know I drive the  ..Nasty Neighbor crazy, but too bad, he doesn't live that close to me, and one of these days I will paint them when I am ready. |
|
|
|
Post by jeanette on Sept 21, 2005 6:42:54 GMT -6
good idea!! i have some old ringer washing machine tubs that i have flowers in..
tell your neighbor that if it bothers them then quit looking over at your place.
|
|
|
|
Post by trudy on Dec 17, 2005 20:25:15 GMT -6
I use those dryer drums, kiddie swimming pools, 5 gallon buckets for some container gardening, even found a nice size watering tough someone had thrown away. I've grown tomatoes, peppers, herbs and other veggies as well in them. I am currently experimenting with making rubber boards from tires for my raised beds. I have one finished and is working well. I like the thought of permanent borders that I shouldn't ever have to replace. And its keeping a few more out of the landfills. trudy
|
|
Deleted
Deleted Member
Posts: 0
|
Post by Deleted on Dec 18, 2005 7:39:54 GMT -6
 I like how you think Trudy! Canya post some pics? Sounds like a great idea!
|
|
|
|
Post by trudy on Dec 18, 2005 8:27:26 GMT -6
I'll try, here is one tire border I built. 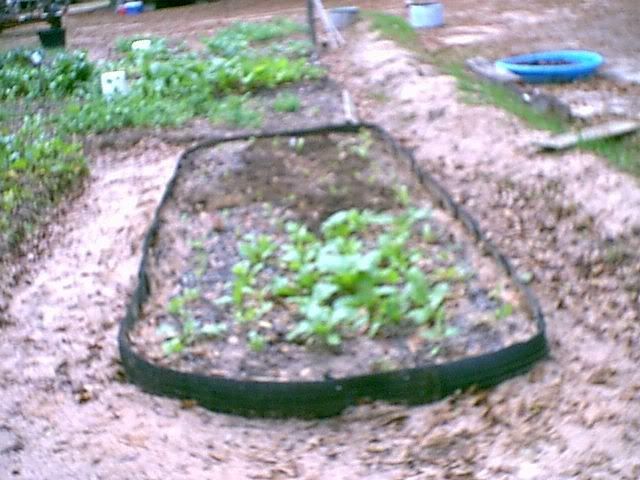 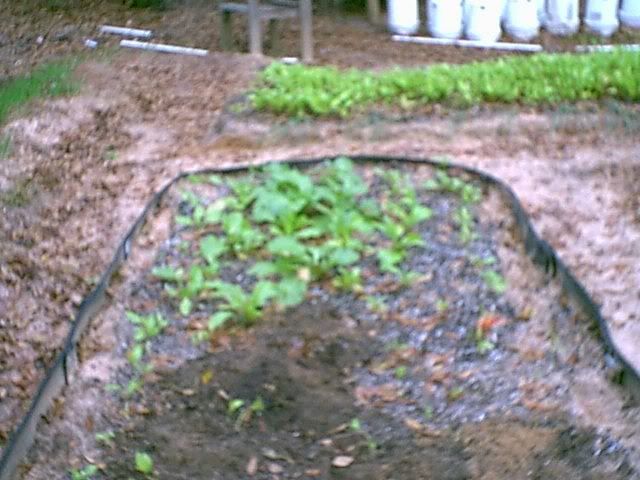 I also like using those large containers trees come in from nursery's.   I can't seem to find the 5 gal buckets maters, must have deleted it from the host site. trudy |
|
Deleted
Deleted Member
Posts: 0
|
Post by Deleted on Dec 18, 2005 9:01:00 GMT -6
Excellent!
I inheirited a bunch of tires when I moved in here and now I know what to do with em!
Now for the barrage of questions!
How did ya cut em?
What kind of fasteners did you use?
How do ya keep em in the ground?
|
|
|
|
Post by trudy on Dec 18, 2005 9:38:58 GMT -6
First let me say this was not my idea, I found it online and I tweaked it and simplified it. The only supplies/tools I used were: sawzaw with metal cutting blades Phillips #10 x 1 in sheet metal screws Power drill with phillips head hammer rebar (cut with the sawzaw to the needed lenght) mine were about 24 inches for depth in my sand soil. 2 young men willing to help It took a couple of young men to help here as my joints won't let me take all the jarring of the saw. But the entire tire can be used for something, the rubber boards are cut by sawzawing the flat part of the tire off, cut your pockets from the sidewalls (they already have a bow to them for the rebar to fit into). Get your measurements you need. The one pictured was a total of 38', 6 tires was used for this project. The bed is 5'x14'. I will post pics as to how it was put together. The only part not used was the inner hard ring that is right next to the rim, but that can be used in the garden for seed planting to keep seeds from getting washed away in a hard rain. Here is where the pockets come into play. I used 3 pockets per tire strip. It keeps the sides up. The rebar is inserted inside the bow part of the pocket, 2 screws on each side to hold in place. The rebar anchors it down. 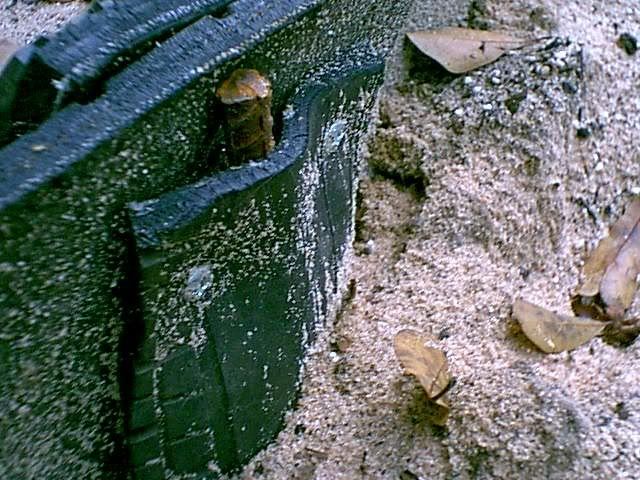 Here it shows how the tire strips are attached together. 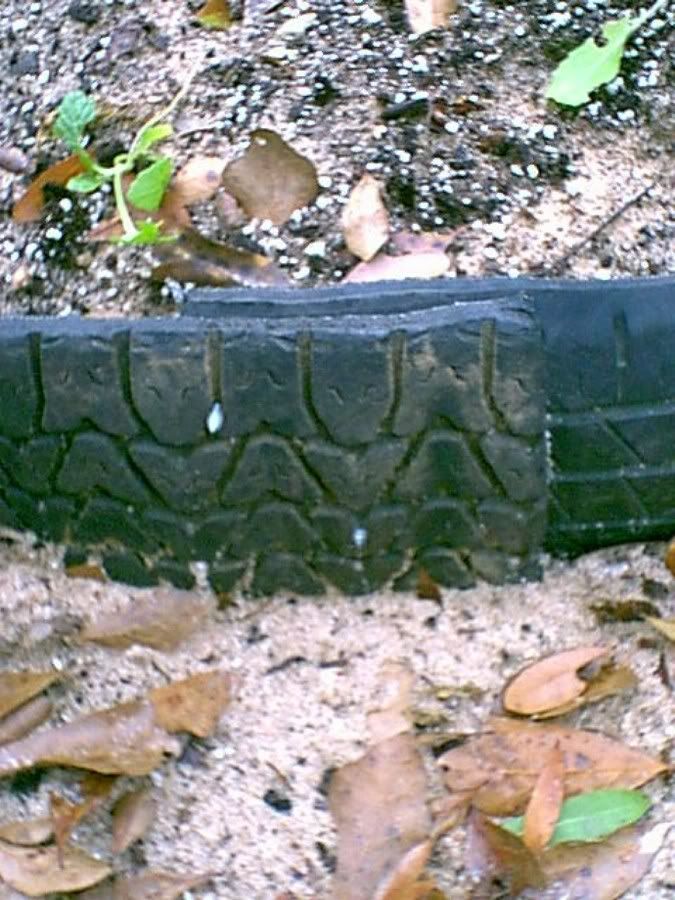 Finished project I rounded off my bed that was more cornered, but that was no big deal for me. The orginal instructions was way more involved and I would have needed more materials and tools. The time consuming part is the cutting of all the pieces you need, assembling it was a breeze. trudy |
|
|
|
Post by Compost Pharmer on Dec 18, 2005 11:31:49 GMT -6
 Trudy, looks like a pretty good idea for raised beds. Also it beats throwing the tires into the landfiill. Your raised beds look great. Should grow some pretty good veggies. |
|
|
|
Post by trudy on Dec 18, 2005 12:50:56 GMT -6
Thanks Greg, I've grown quiet a few veggies in these beds. The spring was the beginning. My land has enough of a slope that everything seems to wash away. I had added so many amendments to them to get them ready for planting, then added more this past fall for the winter growing. I could easily see it all washing away with the winter rains. Part of my problem was the sides of the raised beds kept wanting to cave. They wouldn't hold up to the day to day handling like watering, weeding, cultivating. An my DD's cat didn't help any with her digging and running away from the dog thru the garden. I had been trying to figure out a way (real cheap) to border them and only have to do it one time. Boy was I asking for to much! I didn't really want the wooden lumber due to having to eventually replace it. And the cost involved, especially while lumber is so pricey. Didn't want cinder blocks cause they would move on me. So when I came across this I figure this was the way to go. I'll find out as time goes on. I like to experiment anyway, how else would one know what works and what don't. As you can see in the pic I have a makeshift levy going down the one side to slow down water flow, the deer are loving the rye grass and greens btw. trudy
|
|
Deleted
Deleted Member
Posts: 0
|
Post by Deleted on Dec 20, 2005 8:46:41 GMT -6
Trudy thanks sooo much for sharing and the pics are A#1 !! You have really inspired me!  |
|
|
|
Post by jeanette on Dec 20, 2005 13:40:03 GMT -6
oh you guys have me dreaming of green already...
good idea trudy.. i have tons of tires.. i have a couple of big old tractor tires i want to use for something, just to lazy to fill them with dirt...
|
|
|
|
Post by trudy on Dec 20, 2005 16:43:26 GMT -6
Phil I didn't mean to hyjack your thread here.
Jeanette I haven't used any tractor tires, just the kind that are used on pick up trucks, semi trailers. Go for it and let us know how it goes.
My boss came up with an idea today for the extra sidwalls. Cause you won't need all of them anyway. He mentioned using them in the garden laying them upside down (writing face down), plant 1 single plant in the middle and mulch in the inter ring around the plant. The sidewall will help keep weeds down, water goes directly to the roots and the mulch retains moisture. This would be for a single plant like a tomatoe, squash, peppers. I thought that was a pretty good idea. Koodos to him!
Then a coworker mentioned that you could take a tire and cut it in half down the center of the flat (round) area, and make a feeder out of the two halfs. I've gotten one cut already for that but need to somehow clean up the edges where the radial wire is a little rough, then wash it good and put it in the chicken pen as a feeder. The tire feeder will automatically have a trough and enough depth for chicks. One could be a feeder the other half for water if need be. Hope that made sense. Any idea what I could use that the chickens wouldn't destroy and is safe for them if they peck at it. Trudy
|
|
|
|
Post by TennOC on Dec 26, 2005 8:23:13 GMT -6
Yeah, I guess nobody makes the Nylon re-enforced tires anymore, they were easier to cut up. I hate those wires sticking out everywhere.
|
|
|
|
Post by lovetogarden on Jan 19, 2006 23:10:14 GMT -6
|
|
|
|
Post by trudy on Jan 20, 2006 4:43:57 GMT -6
Thanks for the link. I've done a couple of those last year for some peppers. They did pretty well in them. I did have to give them an extra drink of water as the plants got bigger in the heat of summer. But that was no problem. Haven't decide whether to use them this year or not. Depends how much extra space I'll need for overflow. trudy
|
|
|
|
Post by digger48 on Jan 21, 2006 12:01:53 GMT -6
A few years ago we replanted our squash 3 times due to flooding rain. The third time i had some pallets out here so tore some apart. Made square boxes out of em about 12 by 12 inches. These I just fill with garden soil and plant my squash. Worked well and have about 50 now. They are screwed together 1x8 boards. Some are going on 3 years old and look as good as last years. Also made some planting flats out of pallets for use in greenhouse. used 1 bys for it 4 inch sides and what ever came out of the pallets for base. Made a frame to fit on the outside for germanating plants. plastic stapled on it. Believe in doing it cheap. built my grean house for less than two dollar outlay and my time. It's only 10 x14 but serves our purpose well.
|
|
|
|
Post by trudy on Jan 21, 2006 20:36:40 GMT -6
I would love to know more about your greenhouse. Can u post a pic? trudy
|
|
|
|
Post by digger48 on Jan 27, 2006 20:15:06 GMT -6
Not too puter literate about pictures. Niece will be out with her camera in the spring. Its just a regular frame building. About 5 ft on sides as this is the length of the pallet 2x4s. The neighbor got her skylites damaged in a hail storm so they had holes in em. Doubled them up so holes don't match and screwed them on. North wall is all corrigated fiberglass panels. The first few years we tried rolled plastic sheeting. Too much wind here and it would give out. So now have 1/4 inch lexon for the roof. Got it from a sign company that went out a business. Ya can throw baseballs at it all day and they just bounce off. They still have paint on em but hope they weather to clear as the paint remover is 40 bucks a gallon. South end is all clear plastic, with just a second hand storm door that is a full view. The bottom 36 inches on each side of the door is fiberglass panels. For the benches they are old cement forms, 2 1/2 foot by 8 foot with 4x4 out of pallets for legs. Potting sink is just a old sink with the drains removed and a 5 gal pail to catch the dirt. ok this is the verbal and will get her to post some pictures.
|
|
|
|
Post by deb65802 on Feb 24, 2006 1:40:03 GMT -6
 in the big tires you could plant three sisters very easily or make it a strawberry bed. the list could be endless. would also make a great little herb garden.  in the winter you could cover it with plastic and have a greenhouse for cole crops. They would rest snug as a bug in there all winter most likely. debbie n missouri 
|
|
|
|
Post by chickenfarmer on Feb 26, 2006 18:08:23 GMT -6
 Pretty good idea about the tires for raised bed sides. never thought about that. 
|
|
|
|
Post by trudy on Mar 1, 2006 17:43:20 GMT -6
Deb down here we have mild winters so no need to cover crops. They don't mind the cold temps, just sweetens them up. I have all of them finished and only 4 more to install. Just in time for me to get the soil amended and be ready to plant once all frost is gone. My seedlings are sprouting and oming along nicely. As soon as I down load my camera I'll post some pics. trudy
|
|